Saturday 24 November 2018

Workshop at The Forget me Not Kraft Kabin

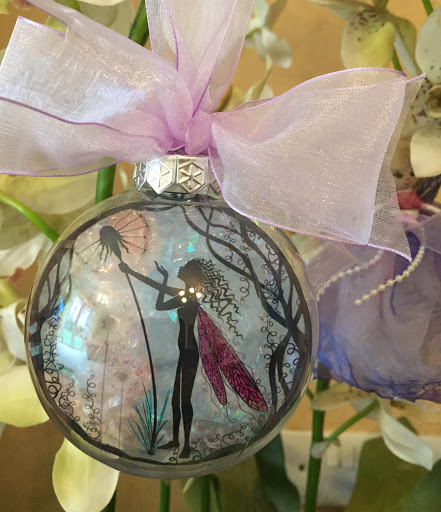
Thank you to the lovely group of ladies who came along today. We had a busy morning making the first three cards. Then in the afternoon we made the next two, and also made a start on the baubles. It was nice to see how you all added your own personal touches. Even if they were the odd finger print here and there!!!!! But we managed to incorporate them into the design 😂. And guess what......I forgot to take photos!!! 😩

Sharon is brilliant and makes everyone so welcome. Her little shop is crammed full of a fabulous selection of craft goodies. Certainly worth a visit. The Forget me Not Kraft Kabin

I’ll be back there next year hopefully on a regular basis. Can’t wait to see you all again. 

Lynne xxx

Sunday 11 November 2018

A couple more for Christmas!

Even though I’m not really looking forward to my first Christmas without my dear Mum, I am enjoying making these cards! I think it’s because it’s forced me back into my craft room and has kept me busy!!! 

Both cards using Lavinia Stamps. The first using Mini hollyFairy ForagersWhimsical haresTwisted willow & Tree branch and in the second card I’ve used the Fairy Foragers again along with Flower flourish.

Thank you for taking the time to stop by. 

Lynne xxx

Saturday 10 November 2018

More Christmas 🎄

Here are a couple more samples made for the workshop at The Forget Me Not Kraft Kabin

The first two using the beautiful Raven along with Tree branch and Flower Flourish. I was inspired by a lady who posted on Lavinia for You Facebook page. I loved how she had hung baubles from the branch. I hope she doesn’t mind me using her idea. 

And then I’ve used Small Fairy fir tree 2Small Fairy fir treeSnowflakes & Christmas Night in the third. 

Again all are relatively quick and easy to make so good for batch making!!! 


Thanks for stopping by

Lynne x

Christmas with Lavinia

Here are a couple of cards I’ll be teaching at Forget me Not Kraft Kabin and Clacton Art Craft & Model Centre

Stamps used in the first are: Small Fairy fir tree 2Small fairy fir treeSmall reindeer

In the next two cards I’ve used a selection of Pound stamps: HollyBerryLeaf 2Leaf 1Maple leafSingle flowerFoliageFlowers

I’ve used sentiments stamps from Clarity and Woodware. 


Hope you like them and maybe could join me at one of the workshops! 

Thanks for stopping by 

Lynne x

Sunday 4 November 2018

Happy Anniversary

This is the card I made for our Son and Daughter in laws 5th Wedding Anniversary. It was great to get back into my craft room after such a long time. Crafting is certainly good therapy. I know Mum would have wanted me to carry on 💕

I used a selection of Lavinia £1 stamps for this and love how it turned out. It did look a mess to start with but I just kept layering until I got something I liked! Stamping with Archival inks, first, second and third generation to give depth and variation. Here are the stamps I used:

Mini leaf Mini leaf 1 Single flower Maple leaf Maple leaf 5 Mini branch Mini berry

Thanks for stopping by 😊x

Thursday 23 August 2018

Lavinia Baubles

These are my samples made for yesterday’s show on Hochanda. I hope you managed to watch and saw how easy it is to make these. I chose to colour my acetate inserts. Amanda thought I had painted them with alcohol inks but I actually used Sharpie pens. Making sure I coloured the back of the acetate, not the side that the image is printed on. When you receive your kits you can actually feel the slightly rougher side which is the printed side. If you add any type of alcohol colour to this side it can affect the image. I also added some pearl drops and some glitter to the printed side of the acetate, allowing this to dry overnight before putting inside the bauble. 

Instructions and kits can be found Here

Just want to mention that on the website it states to colour the printed side of the acetate but I found colouring the non printed side more successful. 

Wednesday 1 August 2018

Hochanda

This one of my DT samples for the Lavinia show on Hochanda tv. We were given 4 sets of stamps to work with and this set contains Autumn Fall and Climbing Ivy

If you’d like to know how I did it, here’s a step by step tutorial: 

Using Distress Oxides on Sheena Douglass Stamping card, measuring 6x6, I started by blending Squeezed Lemonade just off centre.  Then without overlapping colours, added Abandoned Coral then Peacock Feathers as shown. I then went back in and blended the colours using Squeezed lemonade. 

I then took this Andy Skinner stencil and spritzed with water. I laid it wet side down onto the background and allowed it to sit for a while. Then removed the stencil and blotted with kitchen towel. This gives a lovely bleached effect. The trick is not to use too much water otherwise it will leak around the stencil and you’ll lose the pattern. 

Curving the large Ivy stamp onto the acrylic block I stamped it around the outside edge using Aquamarine Archival. 


Then did the same with the small Ivy and Sunflower Archival. I then stamped the Fairy with Black Archival and heat embossed her with clear embossing powder. Added some colour on her hair and wings then some pearl drops around the edge which you can see on the finished card at the top of this post. 

Thank you for taking the time to visit my blog. Let me know you’ve been by leaving me a comment if you can 😊

Lynne x